

Before you start. You’ll need a Lusha account with API access, a Make account, and a Google Sheets spreadsheet with a header row (for example: First name, Email, Phone) so Make can detect your columns.
Step 1: Open your Lusha API settings
Go to the Manage API keys page in Lusha.
Step 2: Create an API key
Create a new key, give it a clear name (for example, “Make integration”), and copy it. You’ll need it in Step 6.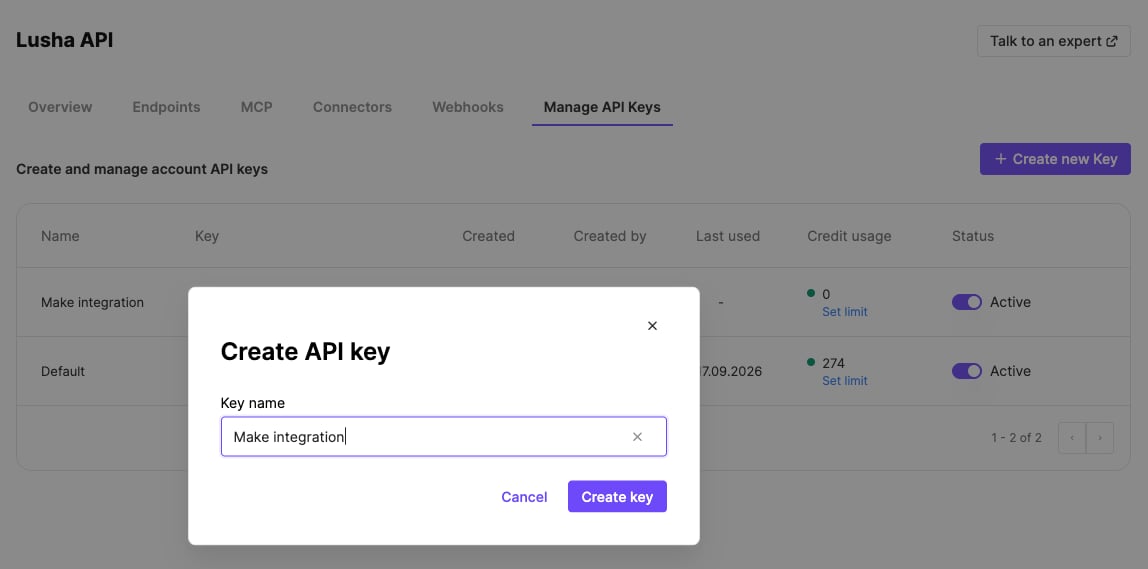
Step 3: Create a new scenario in Make
In Make, click Scenarios in the left sidebar, then Create a new scenario.
Step 4: Add the Lusha app
Click the large + button and search for Lusha.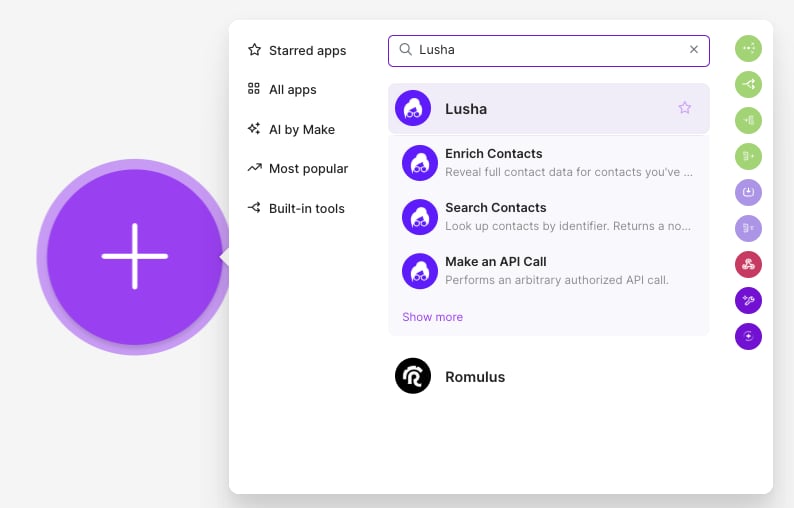
Step 5: Select the module you want to use
In this example, select Prospect Contacts by ICP.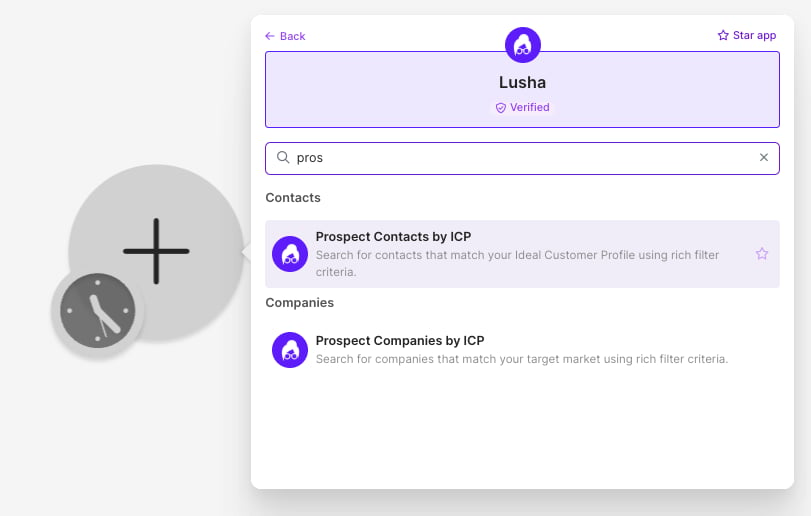
Each Lusha module takes different parameters, so the fields you see in the next step depend on the module you pick here.
Step 6: Connect your Lusha account
In the Connection field, click Add and paste the API key you created in Step 2.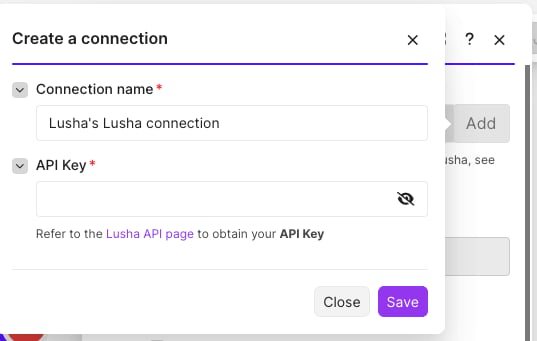
Step 7: Define what you want to search
Fill in the parameters you want to search by. In this example we’re searching for marketing directors in the US.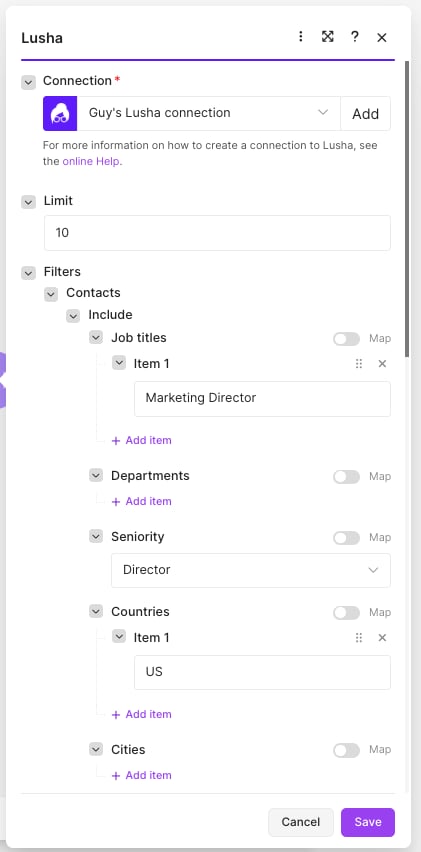
Step 8: Test your search
Click Run once and check whether you received results. If you did, you’re ready to enrich these contacts to get their emails and phone numbers.Step 9: Add the Lusha Enrich Contacts module
Click the + icon and search for Lusha - Enrich contacts. In the Item 1 field under Contact IDs, select Contact ID, then choose the details you want under Reveal, such as emails and phone numbers.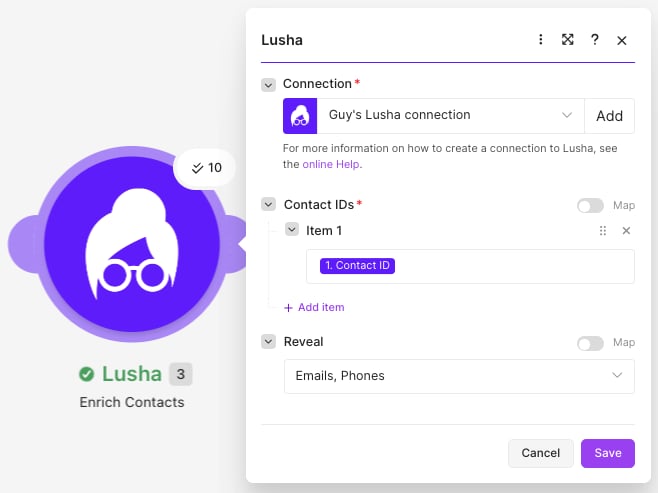
Step 10: Connect your spreadsheet and add a row
Click the + icon, search for Google Sheets, and select Add a Row. This adds a new row every time a contact’s details come in.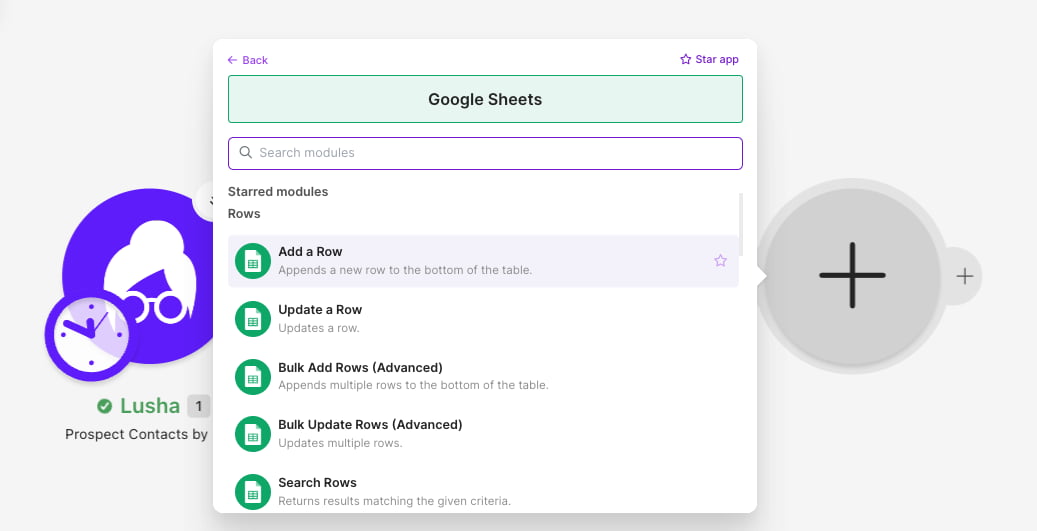
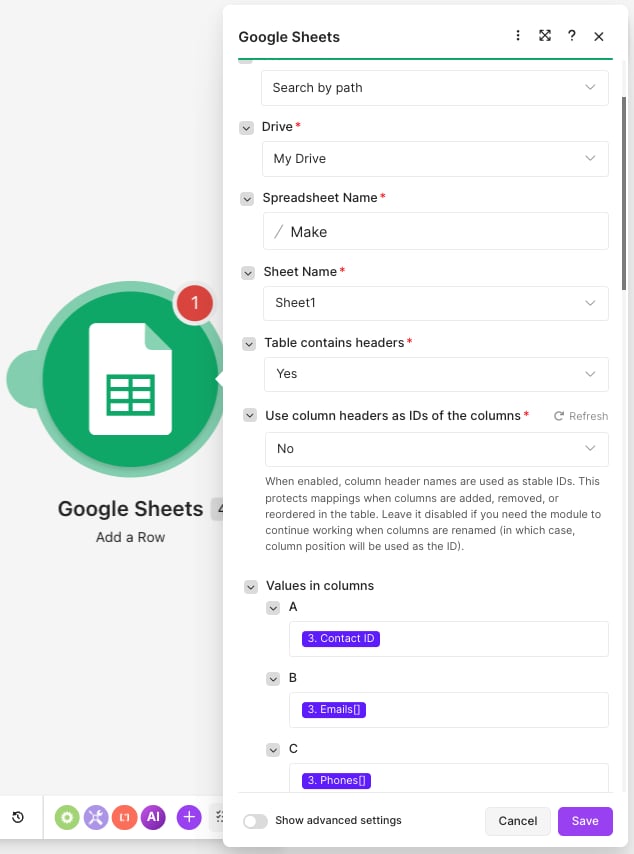
Step 11: Run the flow
Run the scenario and check your spreadsheet. You should now see a row for each contact with their details.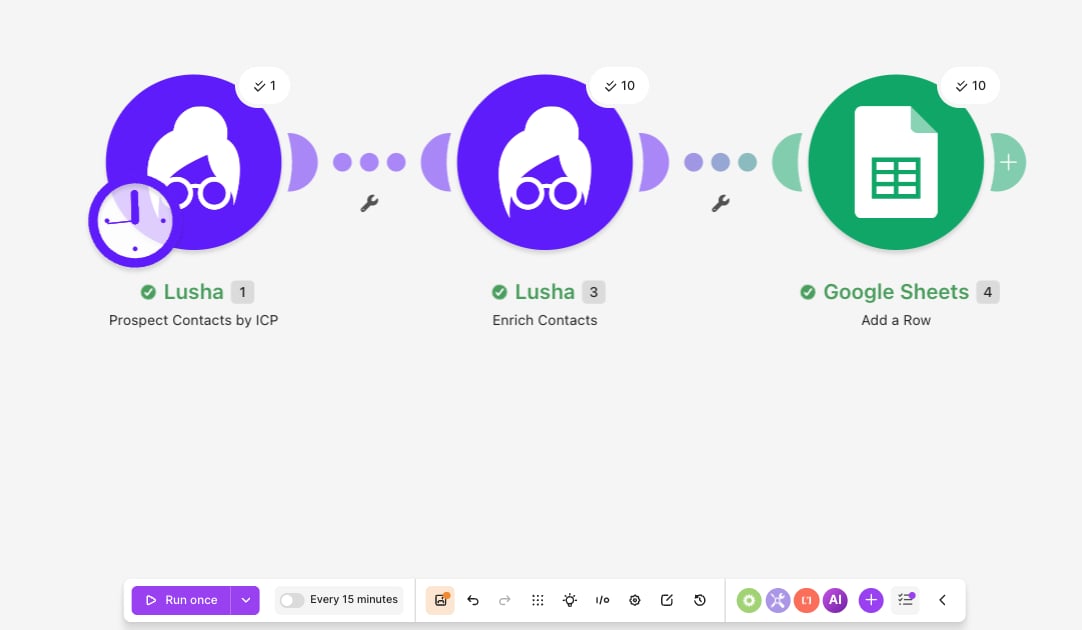
Next steps
Lusha Connect on Make
Connector overview, available actions, and other use cases.
Prospecting filters
Every filter you can search by, and its valid values.
Enrich Contacts
The endpoint behind the Enrich Contacts module.
Credits and billing
How prospecting and enrichment consume credits.